Checking my hubby's jeans pockets; I have to reach in past my wrist:


Granted, those are the worst of the lot for teeny pockets, but none of my jeans are much better. Crazy.
Checking my hubby's jeans pockets; I have to reach in past my wrist:
Granted, those are the worst of the lot for teeny pockets, but none of my jeans are much better. Crazy.
So, the next thing to make for the 2022 Start with a Scarf wardrobe is a hat. I have the fabric; didn't have a hat pattern. I pondered it a bit and decided I wanted a baker boy cap...think Barbara Streisand in the opening scenes of 'What's Up Doc?'...and hunted around online to see what I could find.
I found this you tube video on drafting your own cap:
It didn't look TOO hard, so I gave it a try.
1) All the given measurements are in metric. Which is ok, in and of itself, but I only have one ruler that has centimeters on it...and half of the markings are half rubbed off.
2) She's not always really clear on landmarks...ie, which end of a line to measure from. I watched the bit about drafting the brim pattern, which starts with a 10.7 cm x 10 cm rectangle...several times, pausing it over and over, and started over about three times.
3) The pattern for the band ended up being an inch smaller than my head measurement (no attempt is made to explain how to fit the hat to a different size), so I made the band longer and adjusted the width at the bottom seam of the hat pieces.
I made a 'practice' hat out of Brussel's Washer Linen ...a remnant from pants I'd made a year or two ago...just to make sure I was close on what I'd done. Self-lined it, and used French Fuse on the shell, both band pieces, and both brim pieces. I also cut a brim piece, minus seam allowances, from a plastic folder, to make sure the brim was stiff enough.
I held the plastic piece up to my forehead, and found that the inner curve didn't match the curve of my head at all...if I pushed the ends in, then it either flipped straight up or straight down. I whacked around on it trying to get it to work so much that I had to scrap it and cut a new one....and for that one, I got a ball cap that fits fairly well and traced the inner curve of it. It still didn't quite fit but I found that when I put the ball cap on I could put my thumbs under the band at the corners of the brim so ...maybe it wasn't as big a deal as I thought. Moving on.
It was pretty straight forward sewing; I found that if I started the curved seams in the middle and stitched them out to the top and bottom ends I got along much better. Sewing 'with the grain'...in this case, wide to to tight, kept the bias seamlines from distorting.
I sewed the brim to the band/ band facing, stitched the band to the hat and then hand sewed the facing down. Added the little stuffed ball on top and...I have a hat.


I'm still not quite happy with the way the brim lays...it is pretty low, rather than out straight. The inner curve still is wider than my forehead. Maybe I didn't have that 10.7 x 10 cm rectangle oriented right when I drafted it? And I think the curve in the crown is a little too pronounced. I did not do the topstitching mentioned in the video; my thread didn't match well enough, lol.
But it's not at all bad for a first go and I won't feel awkward wearing it. I'll add my tweaks and I'll watch that bit on drafting the brim a couple of more times. Not sure if I will make the final cap or if I'll try another practice one.
We'll see how brave I feel at the time.


Now all we have to do is clean and sort and store the costumes for next time. Rumor has it we will be doing a fairly big Easter production so I kinda think I'm going to have to start sewing Bible costumes. We just BARELY squeaked out enough for this go.
But first, Christmas. And sleep, lol.

The third skirt was made out of another piece of fabric; when I ordered it, I thought it was just two slightly different weave patterns on the same type of fabric, but the 2nd piece was MUCH lighter and I was able to gather the whole 180" to the waistband. It helped that the 3rd skirt was for a larger lady, and the waistband was about 5" longer. but the fabric was so much more cooperative.
So that was 3 adult skirts. I packed up and headed to church as soon as I finished the girl's skirt around 12:30 this afternoon, and I didn't take time to get pictures. It went together much easier; I was gathering christmas-print quilting cotton; the only problem was my own bone-headed boo-boo. I put the skirt on and did a quick look at the gathers; they all looked straight and even so I cut all the gathering threads off and sat down to put the elastic in the casing.
And promptly realized that I'd put the wasitband on inside-out, with the opening for the elastic/drawstring on the OUTSIDE instead of the INSIDE. And I had cut off the extra gathering thread.
I put the seam allowance down and zigzaged all the gathers down, then very carefully removed the seam and gingerly flipped the waistband around and pinned it back down.
It worked. Whew.
1st dress rehearsal...the basic costume check...is tomorrow. I already know I'm going to have to make another skirt but we didn't have measurements for the young lady so I'll grab those tomorrow. She's very short so, as not to overwhelm her, I'm only going to use 2 panels on the skirt instead of 3, so it will be easier to gather.
Hopefully I can get it well started tomorrow night after rehearsal. This is tech week...not going to have much sewing time.
In other news, the dye job on the subtle Christmas sweater came out well; that's a color I can wear without folks asking me if I'm ok, lol. BUT there is a bit of seaming on the sweater, particularly on the neckband and...it was sewn with cream polyester thread. So it didn't take any dye and it shows a bit in a couple of spots.
Ah, well, it's in the back, lol.

No pics, more's the pity, but I did get the waistband on that skirt today. It was a massive wrestling job and it turned out...acceptable for stage, lol. The fabric is a wiry poly rayon blend and it does. not. gather. well.
I actually carted the skirt with me to My Sweet Babboo's physical therapy appointment; it took nearly the entire time to gather and pin the skirt to the waistband Sewing the channel for the drawstring was...not fun. The bulky waistband seam allowance kept wanting to flip up under my presser foot, so I had to try and hold that out of the way while simultaneously pulling the elastic in the waistband out to match the waistband.
It is functional but not pretty.
I have two more skirts to make from that fabric but for the next one, which I cut out before I quit for the night, I shaved 20" off the top of the skirt. It will still have 180" sweep, but I tapered the front side seams 5" on each side. The center back is still just cut on the selvage, but the other two seams will taper down. 20" less fabric to wrestle into the waistband should be a little easier to manage in this stuff. It may end up looking more Edwardian walking skirt than Dickens but I don't have time to wrestle with these things. I just didn't have the right type of fabric to make it.
I have pulled out my Bible costume; I did make the blocking rehearsal so I know what I am doing for the final choral scene. All I have to do know is learn the tenor part for the song...guess I will make the vocal rehearsal Thursday.
Planning to take some time off of work this week to sew, but I have to chauffer the Recovering One to two doctor appointments tomorrow.
We'll see how things go.
Welp, I found myself with more skirts to sew after our last-few-folks fitting on Saturday, so last night I was pushing hard to finish the skirt I already had started.
I had zig-zagged dental floss to the top for gathering, and even gathered a fair amount up. So I took a deep breath and forged ahead, pushing five yards of rather wiry fabric into gathers around the 45" waistband. Took my time sewing it and decided it looked good enough, so I cut off the long tails of dental floss that were hanging about.
Then I found that I had put the opening in the waistband, through which the final touch of the drawstring will go, on the center back seam instead of at the front of the center panel. Too bad, so sad, not redoing it.
Then I set about threading the elastic through it. And discovered that I should have given myself a wee bit of wiggle room; I had cut the waistband exactly 2x elastic + seam allowances. With the really bulky gathers, I lost some space and the channel in the waistband was a little too skinny in places.
Minor problems; I forged on.
And found that the doggone elastic would rather fold in half than deal with a too-skinny casing.
I wrestled with it, trying to get it to lay somewhat flat, and even started topstitching the drawstring channel, brute forcing it to stitch close to the seamline.
Then I realized that the elastic had dodged the stitching and instead of being caught and sewn flat, was folded in half. Again.
At that point I realized it just was NOT going to work, so I removed the waistband altogether, wrestled the elastic out and sliced a very slim bit off at the join, pulled out what was left of the gathering dental floss at that point, cut another waistband a half inch wider and went to bed.
Went to work today, and DS the Elder (AKA the Artist) came by after work to help put Christmas lights on the porch eaves, since My Sweet Babboo is still in shoulder-surgery-recovery mode. And he also brought us our Christmas present...some wifi speakers so we can listen to the same music throughout the first floor of the house at Christmas, which he also set up for us ("I love doing stuff like this" he commented as he opened up the boxes). It sounds fantastic when we have stuff streaming through it; I just have to load Spotify on one of my old phones or tablets, create some playlists and we will be set.
Then I heated up the rest of the Thanksgiving leftovers...that I haven't already put in the freezer...and we polished them off. So I am actually going to have to cook something tomorrow, lol.
I should have headed upstairs and faced the mess again but...Cyber Monday... I had to go hunting for a couple of things. DS the Younger (AKA The Actor) did some streaming so I watched him as I perused the electronic aisles, and I decided to tackle a project that has been waiting for nearly a year.
I got a cotton sweater on sale from Lands' End last year... a subtle Christmas sweater. It was tan with knitted in evergreen trees...nearly missed getting a pic before it sold out but this is it...

It was backorded when I submitted my order in late October of last year, supposed to be delivered in early December if I remember right. Delivery kept getting pushed back...I think I got in in February of this year. It fit well, it was super comfy (like all the Drifter sweaters) and I loved the barest hint of 'Christmas Sweater' in the knitted-in tree shapes BUT the color is a lot more ...yellow/beigey... in person and it looked ghastly on me. What to do, what to do...
Rit dye to the rescue.
So, as kind of a palate cleanse after the disaster yesterday...I am dyeing the sweater tonight. It's been through the dye bath and is now in the post-dye wash cycle; I was shooting for a deep blue-green color and I *think* that's what I have. Won't know for sure until it's dry, but it will be a much better color for me than the beigey-tan it was to start with.
I have to work 4 hours tomorrow and take My Sweet Babboo to therapy, but I think I'll be ready to face that waistband...
I'll post a pic of the sweater after it's dry.
I finished up the brown cloak...

Hard to tell what you're looking at from the pics; it just doesn't photograph well. Long cloak with a shoulder cape and collar on a band. Held together with a hook. Curved edges finished with the serger because 1) I needed to keep as much length as I could and 2) I was going to have to serge the edges anyway to prevent fraying and 3) Time, time, time...

But, it doesn't show nearly as much if the light isn't hitting it straight on, no actor worth his salt spends any amount of time with his back to the audience, and...keep moving, lol. I put the vest and cloak on our Scrooge character and he loved the way it felt.(And it was a Good Thing that I lowered the pockets on the vest; they could have actually been lowered a bit more but they're ok) So...at the moment, anyway, it's in. We'll see what it looks like under actual stage lights next week.
Moving on.
I have a pile of Basic Dickens Skirts to make...three for adults and one for a little girl. I have just enough elastic in the stash to do them, but I'm gonna hafta get some more dental floss...I used all I had on the first skirt. It's the best thing to use to gather a bodacious amount of fabric.
In the *Whew* category, we matched bloomers to sizes on our list today today and we have enough for all the girls who are listed on the cast spreadsheet. I was really worried about those. So long as no one pops up at the last minute who wasn't on the list...we should be good.
Past Thanksgiving now, and all my company has headed home, so I will be focusing on sewing skirts.
Maybe I'll get some Christmassy something up around the house...if I get the skirts done, lol. I have some sick leave to use or lose by the end of the year; I may use it all up this week. If I sew during the day instead of late at night...I'll be less likely to fall ill, lol. So -- preventative sick leave. Right?

This is the pattern I started with for the cloak for our time-traveling Scrooge character. I intended to just use one shoulder cape, but otherwise I wanted the same. I made one years ago when we were doing the Gospel According to Scrooge. I never saw it after that production. Dunno what happened to it...

HOWEVER...today...I pulled out the pattern and, instead of having 3 actual shoulder capes, it has ONE..the other two faux capes are flounces sewn directly to the main cloak. So I couldn't just use the longer one, as I'd planned. I couldn't remember what I did with the first one (it was 2005 when I made it...) but I figured I probably just added onto the actual top layer; it was the only one of the short cape pieces that was cut out. Simple enough to do.
So I pulled out the brown fabric that had been in storage at church since 2005. We'd made some short ladies' capes from it, but there was a goodly bit left. Just rough measuring it before I brought it home, I thought it was close to 6 yards. Turns out it was 5 3/8...and it was a scant 45" wide. Oof. I couldn't put the main cloak pieces on a folded piece of fabric; I was going to have to cut them one at a time. And the cloak pieces by themselves required 54" of length. So, not including the top cape, the collar or the collar stand, I needed 6 full yards. Shortening the cloak really wasn't an option...remember, our Scrooge actor is 6'4". I didn't want the cloak to hit his knees.
What to do, what to do.... I abandoned the sewing room for a time, doing a frantic internet search for ANY black or brown fabric that had a nice drape and found absolutely nothing. My go-to fabricdotcom has been assimilated into the Amazon abyss, and somebody needs to tell the folks at Amazon how to make filters so you can actually find something. Fashonfabrics club was also a fail. I didn't want wool fabric..1) $$$ and 2) moths... and there was just nothing in a drapey poly or poly rayon blend to be had. So I had to make do.
Well, I *could* fit the pieces all on the fabric if I ignored the fact that there is a nappy, sueded surface and just count on the lighting to hid the difference in the shading. We had to have SOMETHING. So, I figured I'd go ahead and make up what I have, and keep an eye open for some wider fabric to make a last minute switch if possible.
Then, when I was laying the pattern out, I noticed that one selvedge of the fabric looked odd. Backed away from it and...it looks like water had soaked all up on only one side, leaving a wavy border that extended as much as 7" in from the edge the entire length of my fabric and was devoid of the nappy surface. It's the weirdest thing. I can't imagine what could have done that. But I had already looked for replacement fabric so...I decided to just keep going, and then run the thing through the laundry. Mayhap if it's just that it got wet and soaked and dried flattened, a trip through the washer and dryer would revive it.
Maybe.
So I got about halfway through it before I ran out of bobbin thread on the sewing machine and decided to call it a night. If I can get it finished in time, I'll run it up to the rehearsal tomorrow afternoon and see how it looks in movement. It may not matter if the nap isn't quite right.
Maybe.


I have to admit...after looking at the photos I posted of the vest-in-process, I decided the pockets were marked too high, and I moved them down about 3/4". Basted everything in and made sure it was all on point, then took a deep breath and sewed the box for the pockets. Had to redo one about three times because I kept catching the end of the welt, but once I had verified that everything was stitched right I slashed through and just kept going.
Since I put a muslin of it on our actor playing the Scrooge character I'm fairly confident it will fit.
It's going to be Friday before I can have a block of time in the sewing room again. The caped cloak is next...
Four weeks from LAST night, the 2022 Christmas production opens.
Yeah, I'm just a little anxious. Life has been very busy. My Sweet Babboo had shoulder surgery last month and he needed more repair and so has a lot more of a recovery than I did. He's not going to be driving for at least another 3 -4 weeks, so I'm doing the chauffer thing just about daily. Working from home to minimize the to-and-froing, I also scaled back my costuming commitment...someone else is handling the Costume Mistress role for this production, I am kind of organizing the opening scene, which is a play-within-a-play Dickens scene. I expect to be making a bunch of little girl pantalets at some point but for now I have a specific assignment.
One of our main characters is a time-traveling Ebenezer Scrooge...long story. Last year, the part was played by a guest actor who had his own costume. But he's unavailable this year; he's traveling with a production called 'The Ebenezer Experience'...if you get a chance, it's worth seeing. So...one of our own will play the part this year. So he needs a costume. And he's 6'4" tall...so we had nothing in our stash that worked. So 'tis my job to get something for him to wear.
He's providing his own pants and shirt, so I'm working on the vest and cloak. And, as the gimmick used for time travel is a pocket watch, the vest must have functional welt pockets.
I had been picking up costume patterns over the years whenever Hancocks (RIP) had a Big Sale, and I pulled a pattern from the collection that really looks rather hideous on the envelope photo


Took me three tries to get the welts right; first ones came out too small, even though the pattern measured right. I did an envelope-style welt so I'm guessing something happened with the diagonal seams. Block fused interfacing to another piece of fabric to cut longer welts and cut the first one out upside down (the stripe order matters). Fused another piece and recut that welt a third time.
I have absolutely everything done on the vest I can do other than the welts. The lining/ facing assembly is constructed, the vest back has the tie ends attached...I'm gonna hafta take a deep breath and tackle the welts. I cut them with the stripes going horizontally, so I'm going to have to sew them exactly right or the stripes will show the boo boo. But I've got to sew it with the lining on top of the welt, so it's going to be blind. Gonna do that tomorrow...when I'm a little fresher than I am at past midnight, lol.
Once that's done, it's just a matter of bagging on the lining and adding the velcro closure and the just-for-show buttons, which I don't have yet.
After this, it's a cloak for him. I have nearly six yards of fabric; I'm going to make a cloak with a short cape and a collar. I hope. The fabric is narrow; each piece, except hopefully the collar, will need a length of fabric. So it's gonna be close.
After that, I have some skirts to make up...and then possibly the bloomers. We'll see.
Costume check will likely be three weeks from tomorrow. I'm running out of time.
Finally, the last post in clearing the backlog that was waiting for the blue skirts to get finished....
Janice's wardrobe picks for July were kinda titled 'Dressy-ish outfit that either resembles a suit or includes a skirt' and you can click HERE to see what she chose for the six scarf-based wardrobes.
Me, I mostly pulled stuff from the closet...some from the 2019 wardrobe, actually, lol.


The Accessories:

Rolling right through the pieces that have just been waiting for the back log to clear; we're up to June. Two tops, shorts or crop pants, bracelet(s), shoes and a tote bag.
Here's the Vivienne Files post for the June wardrobes; here's what I've done:


All the accessories

So I dithered a bit. And I'm not entirely sure I'm thrilled with what I came up with, as it bends the parameters a bit, but...I'm really behind, and I don't have time to sew up something because...Christmas costuming ...so I'm punting, lol.
Anyway, have a look at what Janice posted for the May wardrobe selections over at The Vivienne Files, and then you can decide if I'm cheating a bit here or not.
 t.
t.I am straying a bit from the shades of pink and green I've used so far. That clear, cool pink is REALLY hard to find, as is that particular shade of mint green. So I'm allowing some variations, lol. The greens in the dress were one thing, but when I picked the emerald green sweater from the closet I just went deep. It's actually the same style as the white sweater shell in the April set...bought on a big Chico's sale; I just got the sweater in two colors. So it is my last second pinch runner, lol. But...I think it works. I put the scarf on it and it goes, so I'm calling it good.
You will recognize the dress as the one with the rather bungled pocket job but it IS fun to wear...and I have gotten compliments on it when I dared to wear it out of the house, so I'm guessing no one is looking at the wonky pockets, lol. Life is short. I'm wearing it.
The pants are the linen no-side-seam pants from the SWAP Wardrobe. I've worn them several times over the summer and they are very comfy. I really like linen pants; it's the rustic linen from Fabric-store.com and it made up beautifully. The earrings are from Fierce Lynx; the bracelet is from Novica...both were purchased earlier in the year because I knew I would need some mint green pretties. I got the Aravon sandals last fall on sale when I first started adding pink and green to the wardrobe. Again...kinda different, but they work really well with the dress.
So, here's all the clothes so far:


Holy moley. It's nearly November and I'm just now getting the April set up.
Just for the record, I'm going to just carry this into 2023; I just have bits and pieces on some of these sets to do but Christmas production costuming has kicked in and I have a PROJECT to tackle...more on that later. But the culottes from this set have just been languishing. I've got to clear my sewing room for the PROJECT so I just bit the bullet and finally got them finished up tonight. Which means I can post the set, lol.
Because it's only been nearly 7 months since Janice posed her picks, Here's a Reminder as to what she chose. It's a skirt, with two top options, a bag, a pair of shoes and a pair of earrings.
Here's my take:


I thought that would be the completer for the..June? I think? Set, but when I pulled the white campshirt from my closet to photograph I discovered it had some spots on it. I'm hoping they were from the last trip through the dryer...we've had the dryer fixed lately as well...and they'll wash out. Otherwise I'm going to have to replace it. :-(.
But, I have been doing future planning; the August set for the wardrobe contained a jacket and an outerwear scarf. I didn't have a topper scarf to wear in anything close to these colors, so I went hunting. Couldn't find a scarf (that wasn't redonckulously expensive) that came close, either, so next I started trolling fabric sites. Found a double-faced cotton/wool blend flannel...on sale, no less...and got two yards. I hit the fabric jackpot and got the end of the bolt...about another 3/8 yard...thrown in.
It's fantastic. I cut 12" off of one side, trimmed off the selvedge (which was lovely, actually, but the other edge wouldn't match), straightened the ends and fringed it all around, mostly whilst on a video call. This is a great winter scarf now...and it could easily have cost $60 if I had bought it at retail. Now I've got about 2 3/8 yard of 47" fabric left...pondering options for that. A waistcoat and a baker's cap (aka a newsboy cap) are both high on the list.

I'll probably post several sets really quickly once I get the 'April' skirt done, lol. We'll see...
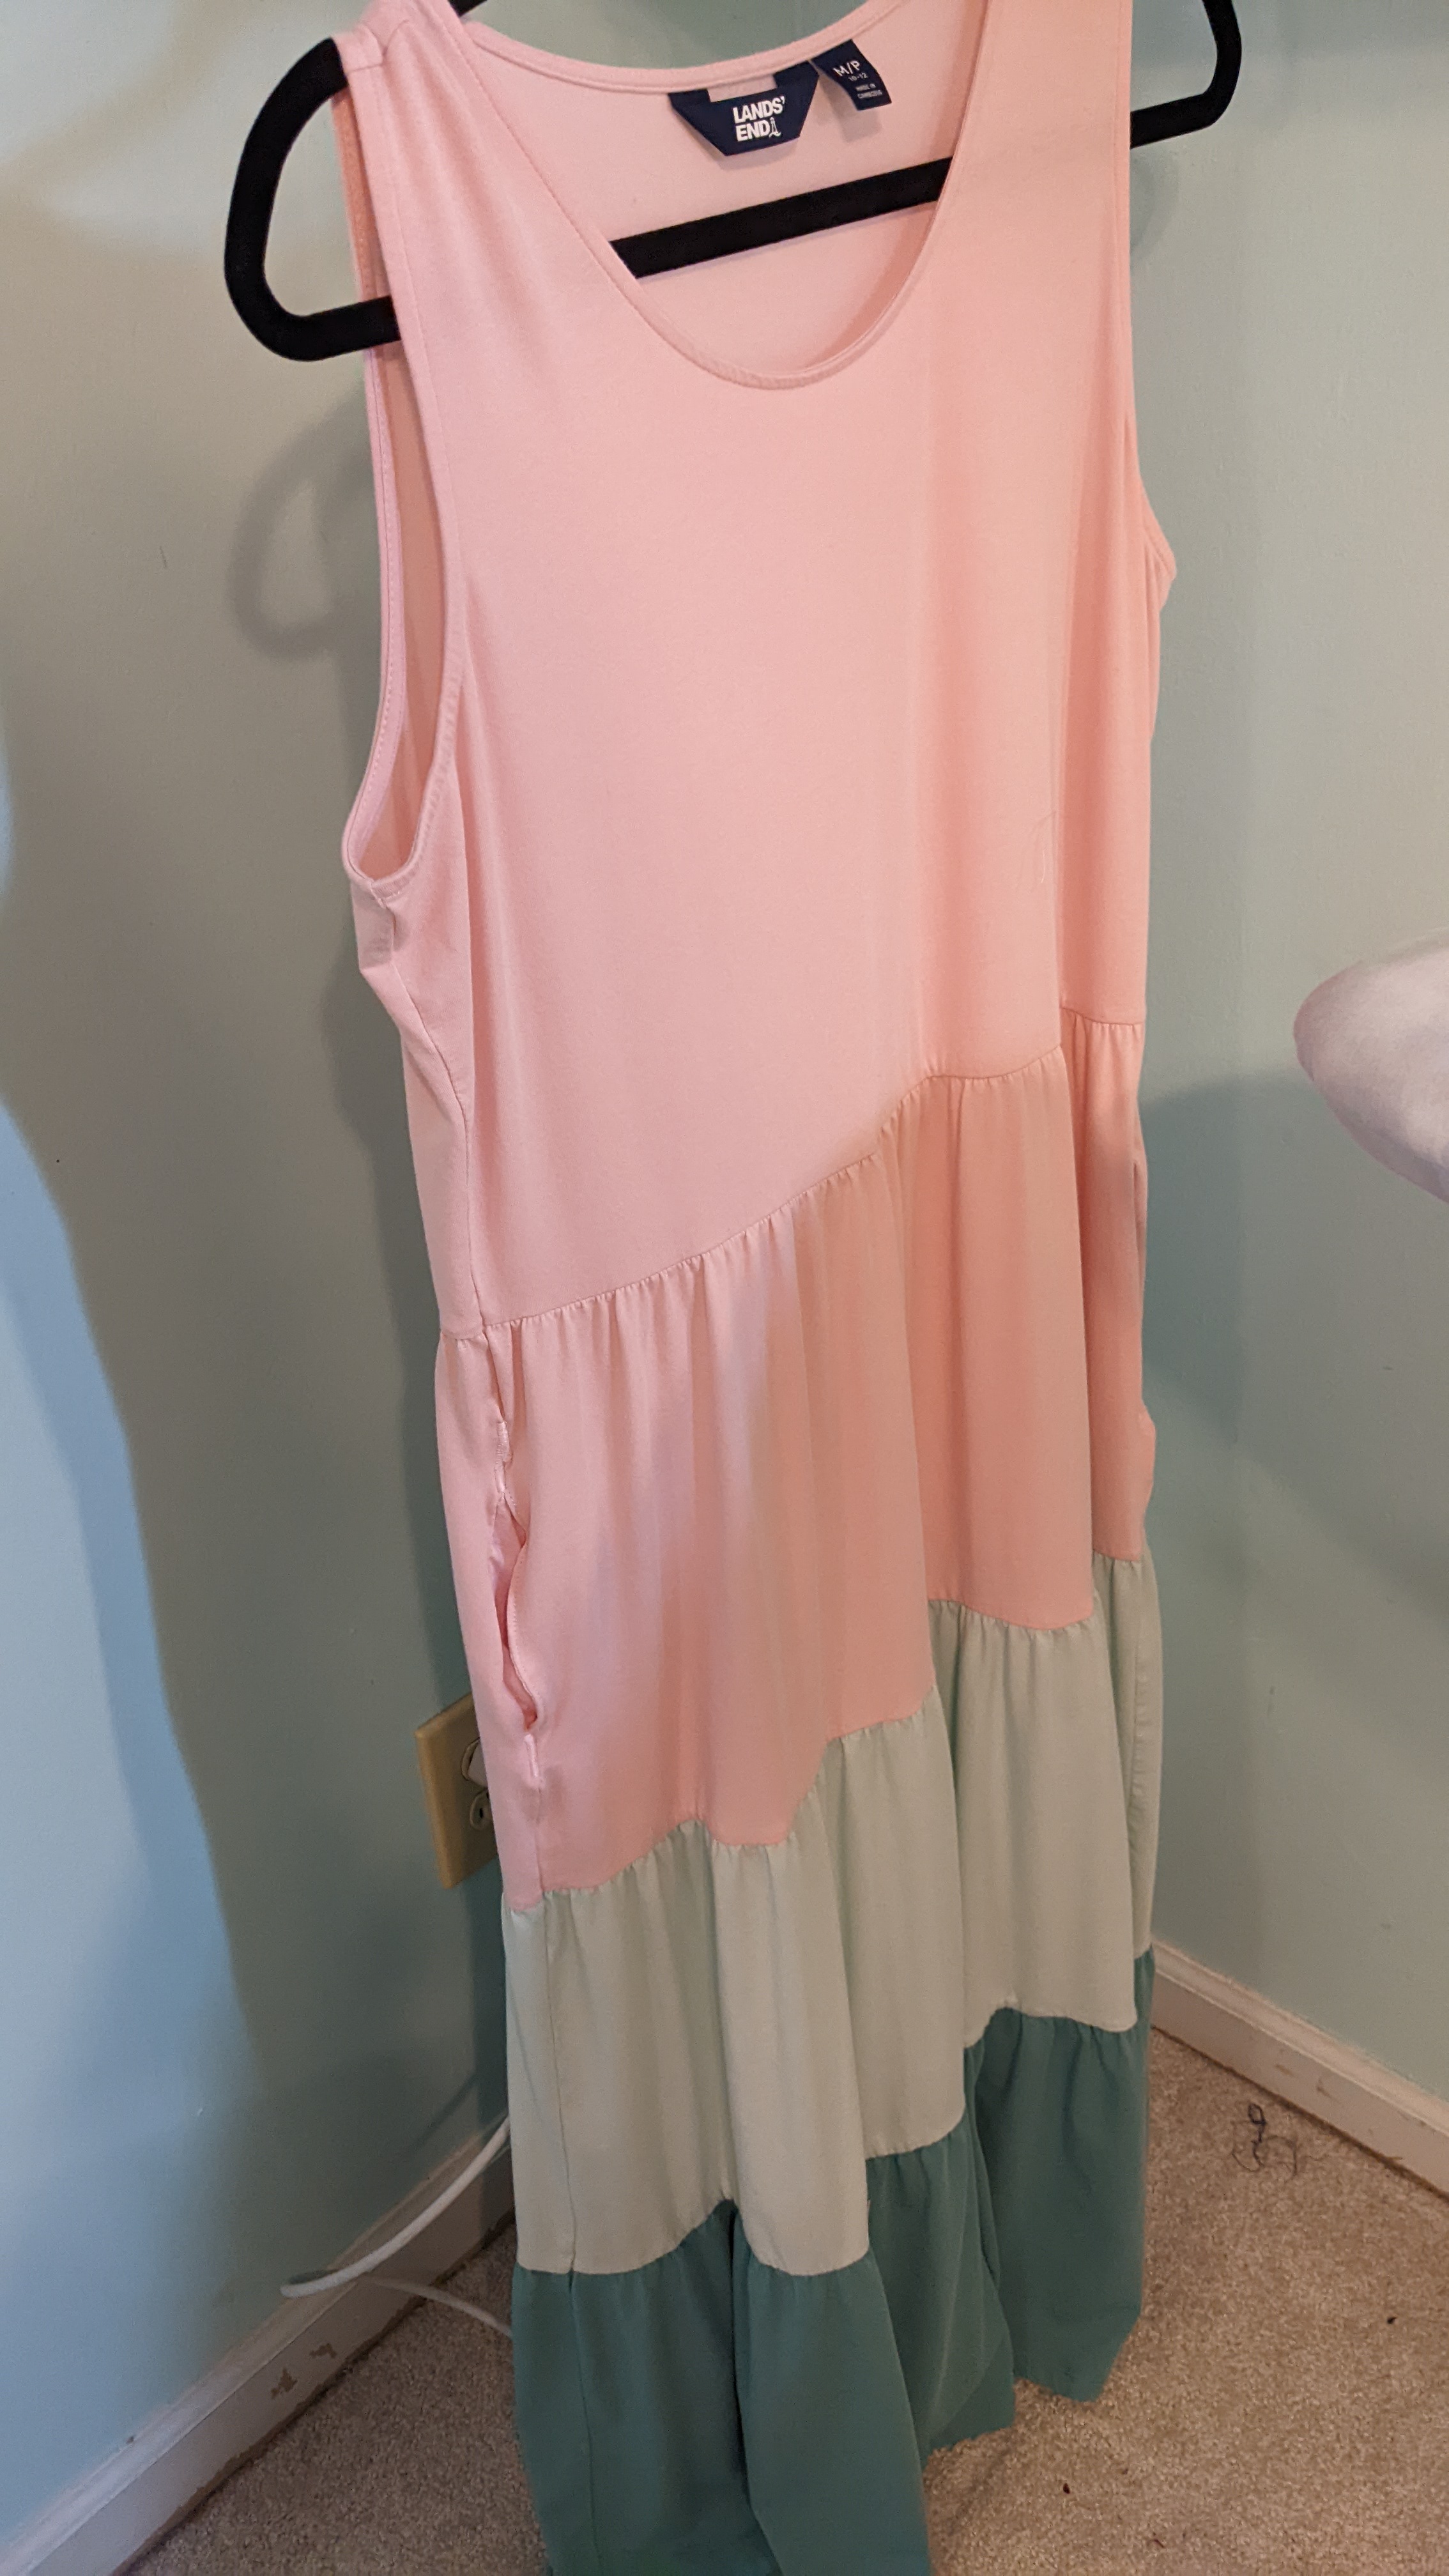
So, still not being able to lift anything heavier than a coffee cup, I decided to try a little project.
Earlier last month I bought a dress from Lands' End on a massive clearance markdown.

Which means it likely would just hang in the closet.
But I had some pink knit...what about putting in some pockets?
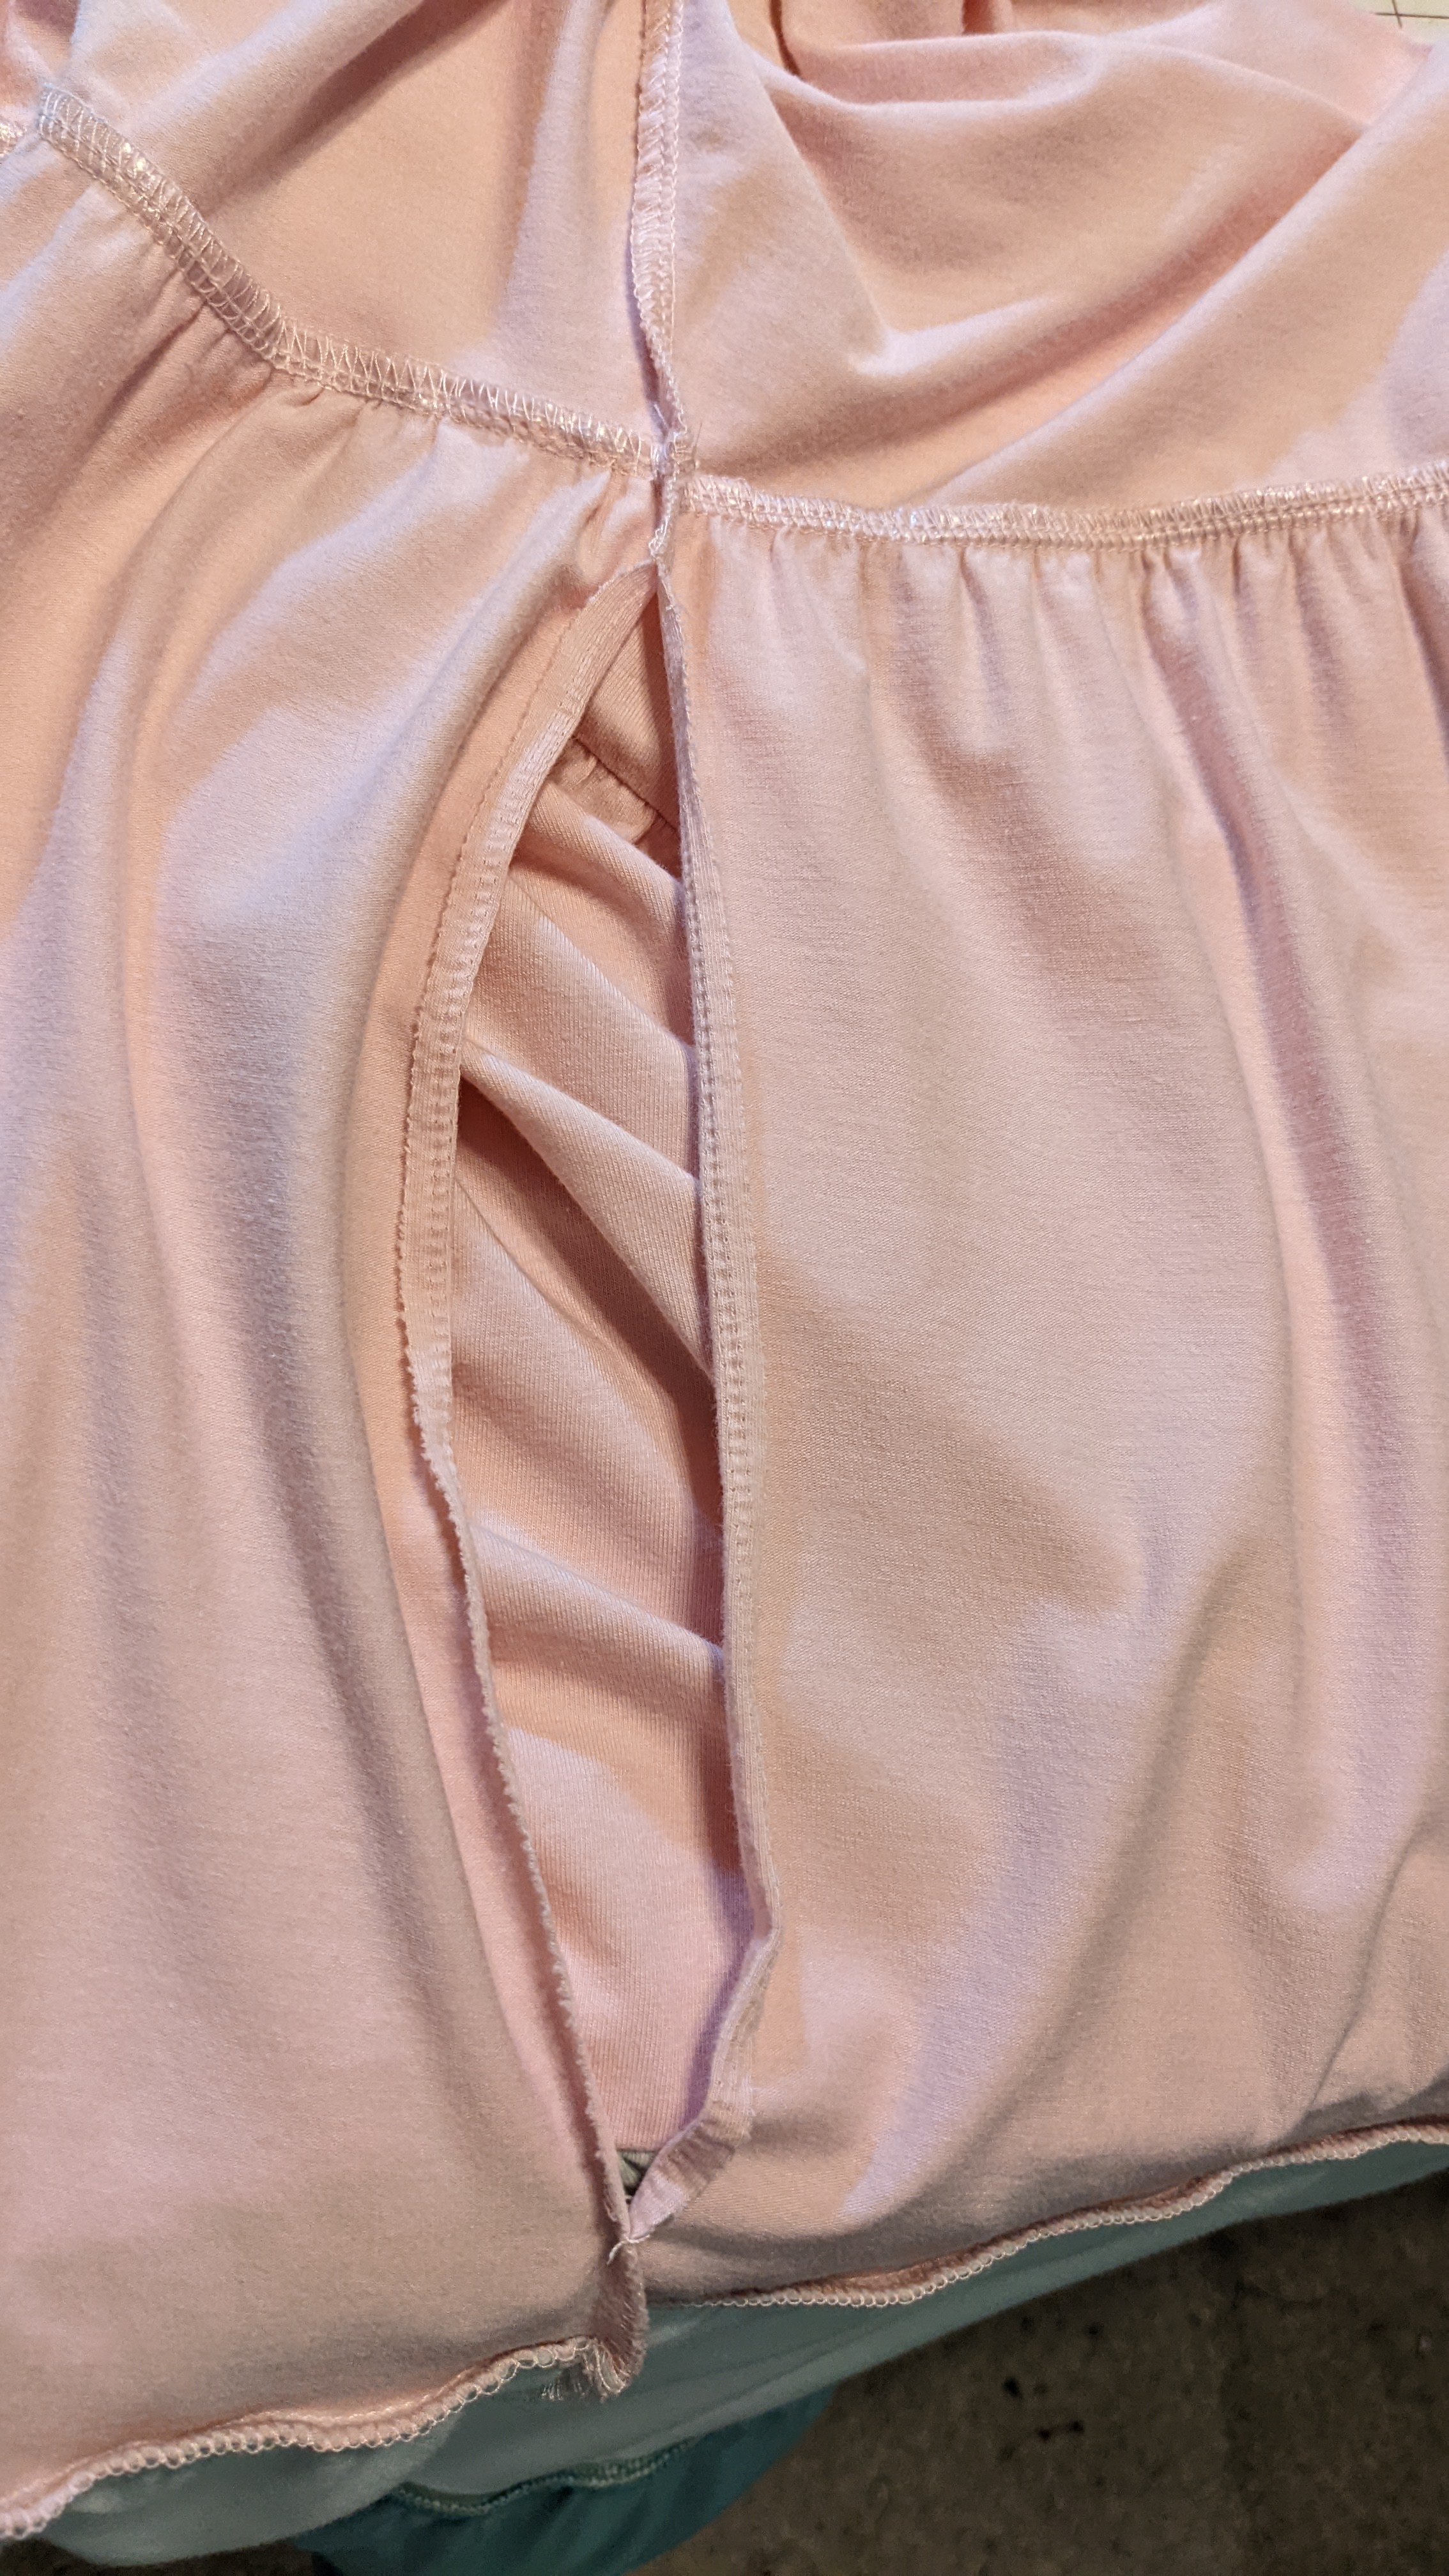
Unfortunately, 1) I couldn't interface the pocket because I'm still not handling an iron. Knowing what I know, a RTW pocket likely wouldn't be interfaced anyway. I did a quick look around for something suitable for a sew-in reinforcement but found nothing so I soldiered on.
And as I had so little seam allowance, I decided to modify my favorite pocket application and just curve the ends of the opening instead of doing a square turn.
Um, that might work but I didn't think it through enough and I ended up not leaving enough seam allowance on the pocket.
I did some ripping out and restitching but, well, there were a couple of, um, unstitchable areas (aka, holes in the fabric) when I was done.
No problem, I'll just do a little bar tacking to reinforce things.
Um again...somehow, the bartacking turned into a satin stitch on the seam on one side. Had no idea I had sewn that far until I took it off the machine. It felt like it was hardly moving; I half expected a thread nest. Nope...just some crazy stitching.
Yeah, it looks pretty bad on that side, but it was the one with the worst, um, weakness in the seam. The other one looks like much more normal bar tacks.
Actually, that is the first time I have ever attempted to add pockets to ready to wear. I did too many on the fly alterations to my normal pocket construction process, but I did learn a bit. # 1...don't clip anything until You Are Sure. #2 Interfacing. #3 don't forget the seam allowance, silly. #4) There's a reason it's a corner and not a curve.
It may just get worn around the house...but it will get worn. Which is more than would have happened had I not given pocket augmentation a try.
So, ten days out and I'm out of the sling and back to ten fingered typing.

I'm moving my arm fairly well, if a bit slowly. At least, so long as I'm raising it straight in front of me, lol. Lateral motion is not quite so far along. And my arm is still pretty much purple and green above the elbow. Hence the ice pack, lol.
But I've been told not to lift anything heavier than a coffee cup for at least a bit longer, so, while I think I could manage to do some stitching, manhandling an iron is still beyond me. So I think I will work on patterns/ cutting for the weekend, anyway. Mayhap by next weekend I'll be able to push the iron around and press seams and hems and such.
But, you know, I was extremely blessed in this whole thing. Not only that we caught it early enough that it was a simple fix...so far as orthopedic surgery goes, that was probably the least invasive, most minor procedure I could have had, but the surgeon told me in my post-op visit that he was glad we'd gone ahead and done it, because 'there was bad stuff going on in there'. I had two small bone spurs that were beginning to saw away at tendons and such. He cleaned up the 'frayed' bits, but no major repairs were needed...yet.
But beyond that, I realize that I was extremely fortunate to be able to get it taken care of. We have fairly good insurance, and I have a job that is flexible enough that I can take off time/ work from home so that I could actually get the repairs done. I know there are many, many folks who don't have that option. My Sweet Babboo can work from home so he can take me to my therapy appointments until my arm is up to driving...maybe next week. And that's a blessing, too.
I did a little checking to see what causes bone spurs...basically, it's the body's response to osteoarthritis/ thinning cartilage in the joints. Now, I've been told for years that our bodies are basically very smart and can heal up but...can't it tell the difference between cartilage and bone? If I'm losing cartilage, that's what it should be making...right? (Insert laughing emoji).
So, not much sewing will be happening in the immediate future, but I might be able to get a queue of sorts lined up and ready to go once I feel like I can do all the stuff. Janice has been releasing the August wardrobe picks piecemeal this week because she's had trouble finding suitable garments. The Hydrangea picks will be in Friday's post, but the four that have been released already are quite heavily leaning to fall. I'm not sure I'm going to follow suit; down here, I've got at least 8 more weeks of full on Summer before things even start to cool down. I am not ready, in so many ways, to start prepping for fall. So I'm thinking.
Which is good, because I can't do much else...lol...

We are 7 months into the wardrobe; that's 8 sets if you count the core set that was introduced in December.
And I have done the core set and three more...so I've done half of them so far.
And, having a bum shoulder (which is recovering nicely so far) I can't really do anything for at least another week. So I sat down with the computer and looked over the Vivienne Files picks for April - July...recognizing that August is going to drop in 4 days and I'll be another set behind, lol.
Is it feasible to actually do this at this point?
I made a spreadsheet, looking at each month's choices...not just the ones for the Hydrangea Scarf. I had been following the Hydrangea Scarf wardrobe additions pretty closely, because, you know, I had the exact scarf, but looking at the April set...I had to make some decisions. Janice likes to use cardigans as button up stand alone tops; I'm just not comfortable doing that. The stretchy buttonholes in sweater cardigans don't feel secure enough to me to be worn without an underlayer. The Hydrangea Scarf is the only wardrobe with two cardigans chosen for April, and I'm pretty sure they're meant to be used as stand alone tops. The other five wardrobes just have pullover tops or sweaters. So I am going to wander away from the strict application of the Hydrangea picks, starting in April, and look at what all the wardrobes had added. Which, being honest, is pretty much what I did in 2019 when I tried this the first time.
Once I gave myself permission to more loosely interpret the additions, I took a fresh look at my closet. What did I have that could work?
Once I did that, I'm down to needing to sew pretty much just ONE thing for each set. Which is perfectly doable...if I make it a personal priority. For instance, there are two navy skirts in the sets and...I couldn't believe it, but I don't own a single navy skirt. So I'll make the two skirts at the same time...while I have blue thread in the serger, lol.
Anyway, the upshot is that I decided to press on and see what I can get done.
And I'm actually curious to see how Janice will transition this very bright, springy wardrobe into fall.
So, hang on, we ain't quitting yet....
What! Did I get the next set made up overnight? No, this I could pretty much pull from the closet..
Here is what Janice selected for March over at The Vivienne Files...two basic T's, a cardigan, a second scarf and a bracelet.
Here is my take:

The T shirts came rom the SWAP wardrobe, cut from the same fabric as the already-included longer sleeved t's. I bought the scarf at Talbot's a year or two ago, thinking it would be a good candidate for a wardrobe base scarf. I actually ordered the Resourceful Lynx bracelet from Fierce Lynx Designs right after I decided to do the project, because it was my colors. I expected it to show up in the wardrobe picks at some point. The sweater came from Lands' End and I love it...very soft and perfect for an over-airconditioned event. It's the only piece I acquired specifically for this set.
So, everything now looks like this...

We will be stuck here until I get my right arm back, lol. My first PT is tomorrow...we will see what I'm allowed to do after that...
I squeaked out the last garment in the set before shoulder surgery, but I didn't have time to post the set before the timer ran out...so now I am painstakingly typing with my left hand. I will try to catch all the typos before I hit post, but it's quite likely that I will have to make a few edits as I find blunders over the next few days...
Anyway, this is my interpretation of the Vivienne Files Start With a Scarf February wardrobe selections for the PJ Studio Accessories 'Hydrangea Scarf'... which I had just happened to have purchased on a deep discount sale about a year ago.

I made two garments for this set...amongst making a mess out of some gifted diapers, which I was too disgusted to blog about, and making the third trip to Florida since February, lol. The pink shirt is Burda 6908, crafted from a rather hefty twill. The blue pants are Vogue 8712 , funky lantern pants; if you click on the photo you should be able to see the bottom angled band and the round pocket. The green shirt is 4 years old...specifically dyed to match the choir color of the month (I actually wore it to work with the Hydrangea Scarf and white jeans last week). The earrings are from Novica and the blue ballet flats are from Rockport/ Cobb Hill.
And...here's everything so far...

I was rather dismayed to find that if one has shoulder surgery, the sling/ immobilizing brace apparatus is applied while still in the OR, and is not to be removed before the first physical therapy visit.
Which means it must be worn under the clothing for the first few days.
Those things are BULKY, y'all.
I did a few test runs, first under some of my really loose tops...fail...then under a couple of my hubby's t shirts...also fail. I could stretch them over the brace but t was a chore and they were awkward.
So I picked up a three pack of men's 2X (I wanted 3X but they were sold out) t-shirts from Wally World to do a little hacking.
Found a chunk of cruddy black knit that I had made two tops from that turned my bras black when I wore them. My idea was to put a godet on the right side so there would be enough room. Wasn't sure how to go about it but I wasn't after making a snappy looking garment...I just wanted to be decently covered, lol.
So I cut one shirt up the side to about an inch and a half below the sleeve and measured the length of the cut and added an inch for a seam allowance and a hem, should I feel ambitious enough (and have time) to do one.
Then I measured that distance out from a lengthwise fold of my icky black jersey, measured along the fold the same distance +4", to allow for the vertical uptake of the brace, and connected those points with a shallow curve. Cut two of 'em, because I had two black shirts and I was feeling brave.
So for the first go, I sewed the straight edge 1:1 to the slit in the shirt, then put it on over the brace. It wasn't horrible, but the slit actually needed to go up into the sleeve...it was tight across the top part of the strapping for the brace... and I had a lovely (koff koff) drape on the side. It would do...but I thought it could be better. So for the second shirt I cut the slit up into the sleeve about 3", flipped the godet and sewed the curved edge to the shirt, gathering the excess at the middle top 1/4 or so of the curve.

Much better. I hemmed that one and took it with me. The nurse who helped me get dressed after the procedure was impressed, lol.
But as it turned out, we caught the bone spur(s?) before any serious damage was done to tendons, etc., so there was no soft tissue repair needed and I don't have to wear the immobilization brace...just the industrial sling. So there is plenty of room in these shirts, lol, and I should be good until therapy. And maybe I will have the use of both hands much sooner than anticipated...
The 'February' selections for the 'Start with a Scarf' wardrobe included a pair of 'ankle pants'. I wasn't sure what to do but I stumbled across a Vogue Marci Tilton pants pattern (8712) that I had started altering up...sometime back in the past... and decided to give it a go. I had some very drapey rayon 'denim' that I'd purchased to make a shirt back about 8 years ago, but it was not quite right for what I wanted so it just went into the stash. Bingo.
I had to go back and review the alterations I'd made (and undo some of them...no idea what I was thinking at the time) and I cut them out back in May...and they waited whilst I made diapers and the pink shirt.
But they were rather quick to do, and I finished them up today. They are a bit longer on me than on the envelope models...I can't remember if I shortened them or not. (update...I shortened them one inch) But they hit around my ankles, which is exactly the brief for the selection, lol. 'Ankle pants'...


Lawdy my hair! The humidity has froofed it...even in the AC, lol. I didn't bother putting any product on it today since I wasn't going anywhere. Wasn't expecting to have to take a picture. But this is about the duds anyway, right?

When I put it on the ironing board, I promptly found that five out of the eleven buttonholes had unraveled to some degree in the repeated trips through the washer. I don't know if I nicked the stitching when I chiseled them open or if the stitches just didn't get secured well enough at the end of the buttonhole...every one came undone on the second side.
At that point...I pulled out a handsewing needle and buttonhole stitched those puppies. I was DONE.
It is a fairly hefty twill with no drape and lots of grab; a little warm for now but it will be good later. This is supposed to be an overshirt so I would have liked a little more ease over all. If I make it again I might add a teeny bit more ease to the back hips, and I've already added back one of the inches I took out of the sleeves. They're really not short but they feel a little short, if that makes sense. But, to be honest, if this were intended to be worn as just a plain ol' button up shirt instead of an overshirt I think it would do nicely. I don't think it has as much ease as shown on the pattern envelope; I suspect the models were wearing a size or maybe even two up. But it's ok. I do believe I will wear it and that's the main thing. ETA: I did some remembering and remembered that I picked my size based on the finished garment measurements...and I had a brain glitch and made the size I would have made for a regular ol' shirt...not a generous easy shirt. So the fitted-ness of this is totally on me. I forgot to consider the extra ease.
Here is the inspiration pink denim shirt that resulted in the pink twill landing in my mailbox a couple of months ago. I don't know how long the link will work; the website says it's low stock. I know the pink one was on sale a couple of weeks ago. But I'm looking at that shirt...that retails for $268...and shaking my head that it is low stock. Now, I realize the rumpled, distressed state of the shirt is part of the aesthetic but I just can't wrap my brain around spending that much on a chewed up shirt that looks to not even have any interfacing in the front band. And...all but ONE of those color options shows the sleeves rolled up...the gray one has them pushed up. Not one actually shows how the sleeves will fit. Which seems kinda...suspect....
My pink twill (which was dead on the exact shade of pink I want) was less than $20. The buttons came in a bulk bag from Hobby Lobby and cost about $2. Now, I will admit to more aggravation than I expected but most of that was my own bone headed mistakes. I've just spent too much time sewing knits lately and was a bit rusty on the shirtmaking, lol. But, hey, I 'earned' about $246 by making that shirt vs. buying the denim one...right? And the IRS don't even get any of that, lol.
The blue pants for the 'February Set' are ready to sew...we'll see if they will be a little more cooperative.
I finally finished the pink shirt last weekend but I don't have photos yet because...somehow it got a teeny smudge on one of the sleeves while in process. It looks like ink or, you know, a greasy sewing machine lint spot...but the machines are brand spanking new so there hasn't been time for them to accumulate greasy lint yet, and I'm not aware of any ink pens anywhere around, so I've no idea what it is. The shirt has been through the laundry twice this week, hanging to dry in between so as not to set the spot, while I work on it. It's very, very faint now and I don't know if I'm going to give it another go or not. We'll see.
Anyway, once I decide it is indeed the last attempt to erase a tiny blip and iron it, I will take picutres.
Meantime, I will show you this bit:

Those are amputated cuffs, y'all. Once I got the first set of buttonholes on I realized that the cuffs were going to be uncomfortably snug. I did a little research and found that somehow I had mistraced the pattern and they were about 1/2" too narrow. Oy.
Well, I had fortunately (as it turned out) completely forgotten to topstitch the cuffs (and the collar band as well), and I had a fair amount of leftover fabric so...I bit the bullet and cut new cuffs. Took the old ones off and rearranged the pleating (I thought the excess sleeve width was because I had done a different placket finish) and then put the new ones on. No mean trick because I did trim the seams out. But once the new cuffs were on it was a MUCH better fit.
Then I put a bazillion buttonholes in it. No kidding, I'm pretty sure I averaged doing each one of them at LEAST twice. It had been a while since I've made buttonholes and there were some finer points of it that got by me. One or two were crooked. The neckband one had lumpy seam allowances to negotiate (I think I did that one 4 times). Once I lifted the presser foot...forgetting that that resets the template. Oops. Another time I mistook a piece of lint for the mark and put the buttonhole in 1" too low.
Lots of frustration, lol. But all character developing, right? I know enough that a year from now I won't remember the frustration, I'll just be happy with my pink shirt.
It did feel like it took a long time...and it kinda did...but I had diapers to make (and they had issues as well, due to fabric quality...or rather, the lack thereof). So all in all I have had a rather tiresome time in the sewing room and things have not progressed as well as I would have liked.
And I'm going to have shoulder surgery in a little over a week, so I don't know how long I'll be out of the sewing room due to that. Hopefully all that has to be done is removing a smallish bone spur; if we've caught it early enough I shouldn't have much muscle/ tendon damage that needs repairing. Won't know for sure until the doc gets in and sees in real life what is there.
So, I may end up skipping some wardrobe additions for the scarf plan this year... we'll just have to see...
Didn't plan on making a bunch of trips to Florida or losing the use of my dominant arm for a bit. And I may need to use my one-week of sewing time left to make some button up shirts...