Showing posts with label Accessories. Show all posts

Tuesday, December 10, 2024

...and a red hat that doesn't go...or maybe it does...

 My participation in the church Christmas production this year is minimal; I'm just in the chorus of the two Big Numbers...the one right before intermission and the finale.  For the finale, we are in biblical gear so, pulling out the ol' Bible costume for that one.  For the other one, we are in contemporary garb, and were encouraged to dress as 'characters' (ie, baker, barista, etc).  One of the suggestions was 'a granny'.

Well, I AM a granny.  How about a kinda hippy granny?

I had some things in my closet that I probably wouldn't ever wear in public as a combo, but it works for this...

White trainers w/ red trim.  Red sweat pants.  A longsleeved red t shirt w/ white snowflakes.  A white puffer vest.  Red hoop earrings.

But it needed something else...

Hey, remember all those hats I made?

What about a red bakerboy cap?


I knew I had some red corduroy...and some red velveteen....either of which would work.  Found the corduroy first.

For some stupid reason I cut out twice as many gores as I needed.  I guess I was just stuck on the number six.  Either that or I was still stupid from being ill all week (nasty tummy bug followed by a sinus/ ear infection...). I didn't get started on it until late Saturday afternoon. 

Had to use one of my backup machines; that's another story.  It wasn't as happy going through lots of layers as my main Janome...but it worked.

The best thing was finding a crocheted button in my button box...if I remember right, it was a spare from a sweater I had, oh, I dunno...30 years ago?  The sweater is long gone but the extra button was still in the box.

It was a pretty close match.


As you can see from the clock, I finished it up at about 20 minutes till twelve Saturday night.  Woulda been faster but I stopped for dinner and some laundry switching and I had to do a bit of unstitching and restitching because the crown was just a pinch too small for the band.  Tried to fudge it to be a wee bit bigger and it wasn't entirely successful.  There's a tiny pleat in the back band...shhhhh.....it's not terribly noticeable....

And...I would wear that outfit in public, if I switched the sweat pants for cream cords and the trainers for my vanilla granny boots, lol.  Make it just a pinch more uptown, lol.

That's my sole contribution to the costuming this go round. The team that pulled last year's production together whilst I was busy getting the boys married off had this in hand and didn't need me.

And, given how useless I was last week...it's probably a good thing, lol.  Still haven't gotten my appetite back...that tummy bug don't play, y'all.  Word up...wash those hands....a LOT.


Saturday, January 28, 2023

Baker Boy Cap 2.0

 So, while I was fairly pleased with the first pass at the baker boy cap, it felt a little bit on the poufy side.  So I altered the pattern by shortening the cap pieces by about an inch and a half  (rechecking the pattern when I cut out the blue hat later...I marked the pattern to shorten it, but somehow failed to actually do that....) and shaving a wee bit off of the 'hip' curves.  I also reshaped the brim a bit, based on a cap I have that fits...the first brim was just sort of copied; this one I actually rubbed the shape on the paper.

But I was not quite ready to cut into my good fabric and decided to do one more test.  Hunted around and found a bit of fabric that had come to me in a bag of fabric from my aunt, who was a fairly accomplished seamstress back in the day.  There was a bit of a tweedy wool in the bag...not even enough to call a remnant, just scraps, really.  But it was a really pretty taupe...greys, browns, a bit of blue...and there was enough for the cap.

I think I like the tweaked version a little better; even if it's just slightly less bumpy, the brim is a much better shape.

Flat
Pouffed

So now I think I'm ready to  make the actual wardrobe hat, although I think I will wear this one quite a bit too. 

Now I just have to decide if I'm only going to use the stripes of the double sided fabric...or if I will alternate sections between stripes and the solid reverse.

Decisions, decisions...

Thursday, December 22, 2022

Trying a Little Hat Making

 So, the next thing to make for the 2022 Start with a Scarf wardrobe is a hat.  I have the fabric; didn't have a hat pattern.  I pondered it a bit and decided I wanted a baker boy cap...think Barbara Streisand in the opening scenes of 'What's Up Doc?'...and hunted around online to see what I could find.

I found this you tube video on drafting your own cap:

Baker Boy Cap

It didn't look TOO hard, so I gave it a try.

1) All the given measurements are in metric.  Which is ok, in and of itself, but I only have one ruler that has centimeters on it...and half of the markings are half rubbed off.

2) She's not always really clear on landmarks...ie, which end of a line to measure from.  I watched the bit about drafting the brim pattern, which starts with a 10.7 cm x 10 cm rectangle...several times, pausing it over and over, and started over about three times.

3) The pattern for the band ended up being an inch smaller than my head measurement (no attempt is made to explain how to fit the hat to a different size), so I made the band longer and adjusted the width at the bottom seam of the hat pieces.

I made a 'practice' hat out of Brussel's Washer Linen ...a remnant from pants I'd made a year or two ago...just to make sure I was close on what I'd done.  Self-lined it, and used French Fuse on the shell, both band pieces, and both brim pieces.  I also cut a brim piece, minus seam allowances, from a plastic folder, to make sure the brim was stiff enough.

I held the plastic piece up to my forehead, and found that the inner curve didn't match the curve of my head at all...if I pushed the ends in, then it either flipped straight up or straight down.  I whacked around on it trying to get it to work so much that I had to scrap it and cut a new one....and for that one, I got a ball cap that fits fairly well and traced the inner curve of it.  It still didn't quite fit but I found that when I put the ball cap on I could put my thumbs under the band at the corners of the brim so ...maybe it wasn't as big a deal as I thought.  Moving on.

It was pretty straight forward sewing;  I found that if I started the curved seams in the middle and stitched them out to the top and bottom ends I got along much better.  Sewing 'with the grain'...in this case, wide to to tight, kept the bias seamlines from distorting.

I sewed the brim to the band/ band facing, stitched the band to the hat and then hand sewed the facing down.  Added the little stuffed ball on top and...I have a hat.


I'm still not quite happy with the way the brim lays...it is pretty low, rather than out straight.  The inner curve still is wider than my forehead.  Maybe I didn't have that 10.7 x 10 cm rectangle oriented right when I drafted it?  And I think the curve in the crown is a little too pronounced.  I did not do the topstitching mentioned in the video; my thread didn't match well enough, lol.

But it's not at all bad for a first go and I won't feel awkward wearing it.  I'll add my tweaks and I'll watch that bit on drafting the brim a couple of more times. Not sure if I will make the final cap or if I'll try another practice one.

We'll see how brave I feel at the time.

Monday, November 19, 2018

A little charity sewing...

One of the featured elements of any gathering related to Alabama Royal Rangers (Boys ministry program similar to Boy Scouts, only more faith-based) is an auction to raise money for missions.  Items range from gear for the 18-century frontiersmen auxiliary group to Ranger collectibles (patches, etc) to home decor and jewelry (because we need something for the ladies, too) if it's a wives-included event.

The annual sectional Thanksgiving dinner is one such event, so I made a TSW Tamari Apron for my contribution:

It's terrible to photograph...you can't hang it up, because it's worn on the diagonal....head and right arm through the loop on the right side, and it ties to the other end in the back.

The fabric was leftover from my first attempt at a circle table cloth, so it's upholstery cotton canvas.  Which means it's Scotchgarded and stain resistant...perfect for an apron, yes?  I made the ties out of bias tape instead of the canvas, which I felt was too heavy to tie easily.

It got $25 at the auction (I did pull a friend up to model it, lol).  A fair price.

I'm off from work this week, but not much sewing is likely to get done. Too much pre-holiday housecleaning to do.

The Actor is coming home for Thanksgiving (maybe I should change his moniker since he's not that involved in theater...still, children's ministry IS largely performance art, so maybe it still works...) and the married kids will be with us this year.  We're totally traditional...the Macy's day parade, turkey dinner with all the trimmings.  No football here...we watch the old black and white Miracle on 34th street to usher in the holiday season.  I may even start pulling out Christmas decor this weekend, even though it's still November.  Next weekend is booked up, as is the weekend after, so, well, this may be the only chance before the middle of the month.

So...off to see how much cleaning I can get done in the next two days. 

Wishing all my US friends a blessed feast of Thanksgiving, however you celebrate!

Tuesday, February 18, 2014

Work Wear 9 - The Gray Scale Scarf

This set-the-timer-and-jump-in-front-of-it method of photography definitely leaves something to be desired.  The best (read: most flattering) photo was irredeemably blurry; the sharpest focused photo caught some never-to-be-put-online weird expression on my face...so that left this one, with a crooked jacket and the kitty's worst side.

Oh well.  I'm sure you'll get the idea.

Mostly, I just wanted to put together something that allowed me wear the newly-hemmed gray scale silk scarf.

I'm getting bolder in my old age;  there have been times past in which I would've shuddered with horror at the idea of combining the graphic print with the striped pants.  Now I think it's kinda fun.

RTW sweater shell; modified Loes Hinse Oxford pants in a pinstripe RPL topped off with Silhouette Pattern's Robins Jacket in wool flannel, finished off with plain ol' Wrights bias tape.

Wasn't thrilled with the way I tied the scarf, but I couldn't come up with a better way to do it in the time I had available this morning.  Square scarves are not quite as easy to wear these days as long rectangles...

Anyway, that was a silk panel print that came from...Fabric Mart?  I think? ...about a year and a half ago. I wanted to hand roll it but couldn't get the technique down well enough to suit me.  So I wrangled it through the rolled edge foot on the sewing machine and will keep practicing on the scraps that I trimmed away to square it up.  Someday...I will have a hand rolled scarf...

Friday, November 08, 2013

A Little Tote Bag Project

This summer, I found out about a ministry that provides some basic diaper bag-type items for new moms in a foreign ministry. (I'll post more on that when I show the finished bags the girls did).

We just finished a unit on sanctity of life in the high school girls' ministry class, and I thought it would be fun to make the little tote bags that we are to put the goodies in.

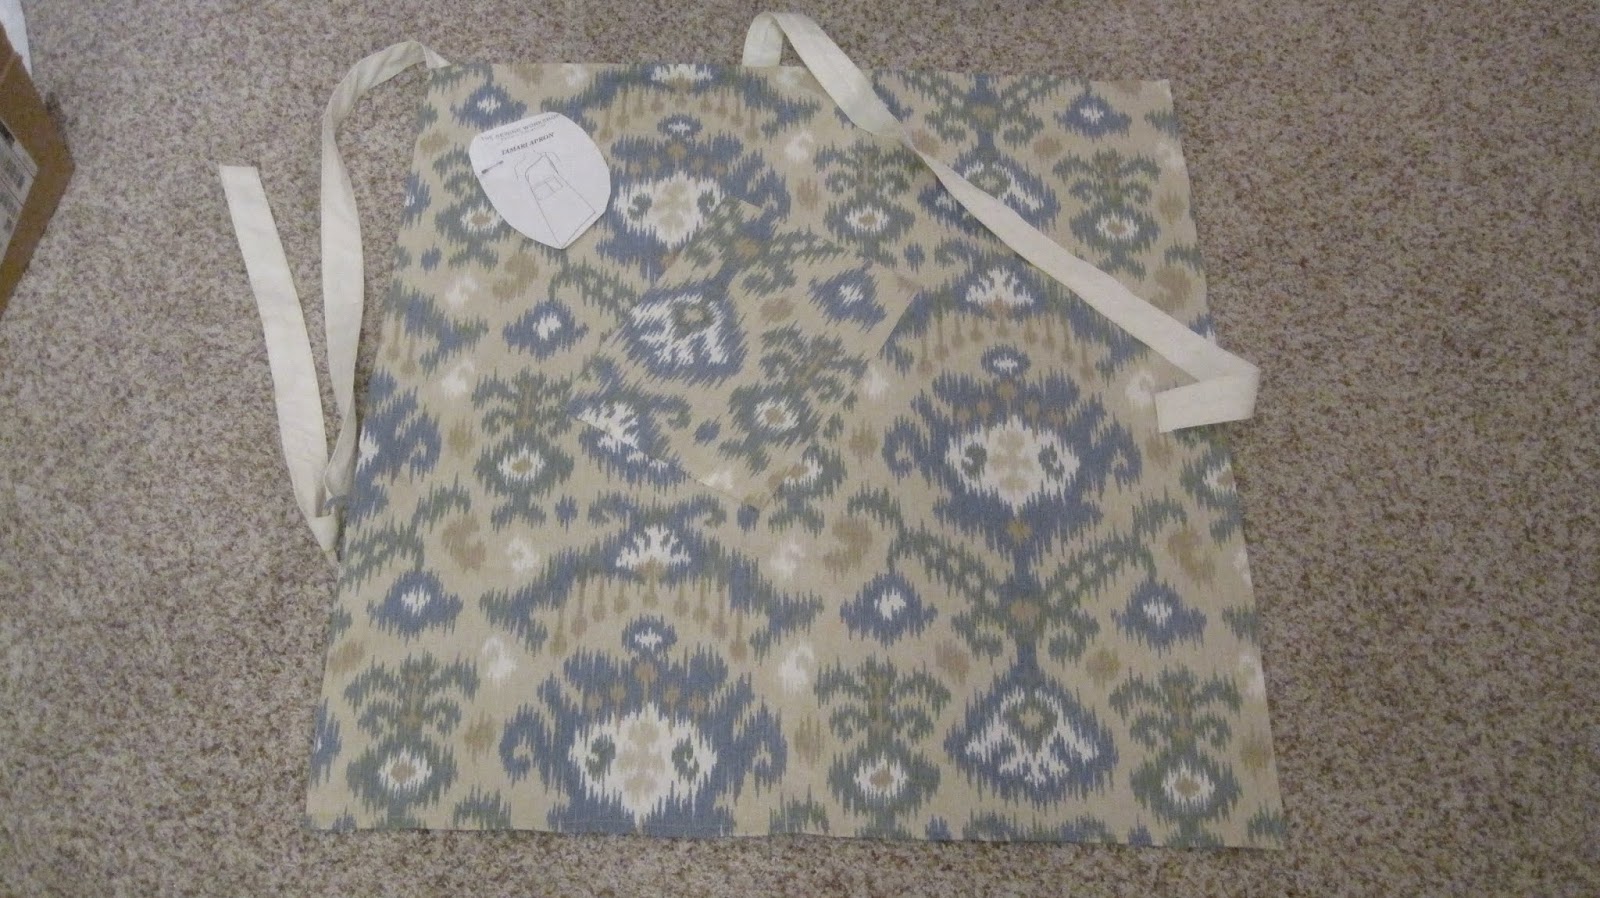
They just asked for the cheap poly bags from the dollar store...sort of like this one ---->


3/4 yd of 45" decent quality cotton fabric is plenty; that leaves enough to square the ends up, assuming it wasn't cut wildly off grain.

So..for the straps, tear two 4" strips across the entire length (they will be 4" x 45"); if the selvedges are an issue, just trim them off.

For the bag body, cut two rectangles 15 x 13, with the longest dimension running along the grainline.


Step 1: make the straps.
Fold the strap pieces in half lengthwise, with the wrong side out, and stitch the length of the long seam with a 1/2" seam allowance.

Tip:  Press the seams open, one side at a time, but be careful not to press the fold.

  Turn strap; press flat with the seam centered on one side.


Step 2: Pre-press top hem:

Fold top edge under 1" (use a cardstock template, if you can)  on each body piece; press.  Turn under a second time and press. Do not stitch yet.

Step 3: Apply straps

Matching one raw edge of strap to bottom raw edge, place strap so that the center seam is towards the bag and lies 3.5 inches away from the side edge..  Then carefully, without twisting strap, bend it back  so that the opposite end is aligned with the bottom raw edge again, with the strap parallel to the other vertical edge, 3.5 inches from the vertical raw edge (I did have a photo of that, but somehow it has gotten misfiled.).


Mark the strap 2" below top folded edge of bag.

Edge stitch strap from bottom raw edge, up to pinned mark, across strap at the pin, and back down to the bottom raw edge.  Repeat for other end of the strap, and repeat entire process for other bag body piece.


Step 4: bottom seam

Lay both body pieces right sides together.

Spend a little time entertaining the sewing assistant, who is obviously feeling neglected.


Stitch bottom seam w/a 1/2" Seam allowance.  Zig-zag edges of seam together, press to one side and topstitch down to give a little more reinforcement to the bottom seam.


 Step 5: Side seams

Fold body pieces right sides together again; open out pressed hem edges and stitch from lower seam to top raw edge w/a 1/2" seam allowance.  Finish edges together; don't press them just yet.


Step 7: bottom corners

This is the trickiest part of the whole bag.

Turn bag wrong side out and pull out one corner to a point.  Match side seam and bottom seam as they go away from the point (you should have a right angle, with the seams lined up running right up the middle).  Lay a flat ruler so that the 2" mark is right on the seams, slide 2" mark along seam until the 'zero' of the ruler is at one edge and the 4" mark is at the other.  Draw a light pencil mark along ruler and remove the ruler, being careful not to disturb the bag.  Pin across pencil mark to secure, then machine stitch on top of pencil mark, securing stitches at either end.

Trim corner off, leaving 1/2" seam allowance; finish edge of seam allowance.

Repeat for other corner.


Step 8: Top hem  

 Press side seams to the side they were stitched down on the corner seam.  Re fold and re-press top edges at the seams.  Turn bag right side out and, with right side against feed dogs, edge stitch hem at inner fold, being careful not to catch straps.


Bad picture of a nice little bag, eh? ;-)

Thursday, January 17, 2013

On the Board

First completed item since back in September...is a skinny scarf.

But SOMETHING is better than nothing...I'm willing to start small...

I had some gorgeous velvet/lame burnout fabric that I used for one of Loes Hinse's vest patterns something like three years ago and had a 3/8 yard remnant left over.

I hemmed and hawed over it; pulled it out of the cabinet and looked it over and then put it back more times than I could count in the past 3 years.  I knew it would have to be a scarf, but it wasn't wide enough to make a decently long scarf.  So I knew I'd have to seam it somehow and I was just not willing to commit, fearing I'd make it look lumpy and home made.

Today I decided I was tired of it taking up space.  A scarf is always sorta rumpled up and twisted anyway...right?

So I tore it in half crosswise, seamed it into one long length and then folded it right sides together and stitched up one short end and the long edge, then I turned it right side out and pressed it lightly and hand stitched the other short end closed.

And it's a scarf.

It's' almost too long for the width, but I can wrap it extra and make it work.  

And it's out of storage and into the closet.  Woo hoo! ;-)

Thursday, October 04, 2012

Squaring Up

A while back, I threw a silk scarf panel into one of my online fabric orders.  It was ten bucks, and I thought it would be a good opportunity to practice my hand rolled edges.  One of the very first classes I took from Cynthia Guffey was her hand stitching class, and it included a marvelous technique for doing hand rolled hems.  Of course, it has taken me 8 years to get around to actually trying it...

The first step, though, is trimming the scarf panel down.  There was actually a little  void in the weave indicating where the panels were to be separated; that I can tell you it is there indicates that the fabric was NOT cut on the mark.  So I measured the narrowest bit of border and discovered that I needed to trim that black down to 2 1/4". 

Here's a tip I stumbled across...the panel was somewhat wrinkled when I laid it on the table, so I thought it would be smart to iron it out smooth before I tried to cut it to exact edges.  However, I found that the wrinkles were very stubborn...and I was afraid my steam iron would leave waterspots.

So, I quickly gave the panel a very gentle bath in some cool water and baby shampoo, blotted it with a towel and began to iron it again.  But I noticed that, damp, it didn't slip around nearly as much as it did dry.  Inspiration hit, and I laid the damp scarf out on my cutting table and trimmed it down.  MUCH easier to work with!

I took one of the long scraps to practice the hand stitching.  I didn't exactly remember how it was done, so I did an internet search for techniques, thinking I'd spot something similar.

Nope.  Not so much.  So I dug out my binder with my collection of Expo notes and found the notes I'd taken in the class.  Played around with it a bit and saw what I had to do to make it work, technique wise.  But it was tricky to do it by guesstimate;  all the tips recommend machine stitching a guide on the fold line.  I had skipped that step to just practice the technique itself

So I took one of the scraps to the sewing machine and stitched a line 1/4 inch from the edge so I could see if having a stitched line as a guide made a difference.
 
But, when I sat down to actually roll and stitch the edge, I was alarmed to see a very subtle, but noticeable, pull line at every single stitch.  So I pulled out a brand spanking new needle (60/8 Universal), stitched a bit on the other strip and...got the same thing.  The Universal needles apparently are not right for this fabric, and the smallest Microtex needle I have is  an 80/12, which I think would be much too large for the silk.  So I'ma gonna do what I did on the first sample and carefully eyeball that baby at 1/4" and see how it goes.  I just can't see putting those pull lines in my scarf...

'Cause I intend to start on it tomorrow; The Artist has managed to damage his knee again and will be having a bit of a procedure to try and correct it once more.  This is a minor outpatient arthroscopic deal, but we will still be at the surgery center for 4ish hours.  I expect to get a good bit of scarf hemming done while I'm waiting...

Saturday, February 13, 2010

Smitten

Now, I am nothing close to a fashionista. In fact, I once thought I could write a book titled Confessions of a Fashion Klutz about my struggle to just look, um, not like Jon Arbuckle, if you get my drift.

I really have come a long way.

Every once in a while, I even get accessories right. But that's rare.

I skip most of the fashion-interest blogs because they tend to be way off my snark meter, but there are a couple -- aimed at women past the first blush of youth -- that I have in my bloglines reading list. One of these, Une femme d'un certain age is written by a lady who's pretty close to my age, so, even though our complimentary colors are just about opposite of one another, I garner glimpses of what it would take to add a little oomph to my appearance.

And she has a scarf wardrobe that seemingly doesn't end; every week she posts a photo of herself wearing one. They look smashing on her; she ties them and wears them marvelously well.

I, on the other hand, generally don't wear scarves well; I can't get past the 'drool bib' feeling. But I'm trying.

Anyway, all of that leads up to me being smitten with a scarf right out of the blue. I once ordered something online from Talbot's, so now I get the email advertising. Usually I just delete it, but yesterday I spotted the words 'Accessories - buy one, get one 50% off' and I clicked through.

And there it was. A Valentine's Day Scarf that struck a nerve somewhere in my little girlie heart.

I wanted really bad to drop a large hint to My Sweet Baboo that it would make a fantabulous Valentine's Day gift, but, well, there's no way I could've pulled it off.

So, while I was out garnering fancy dress materials for The Flute Player, we stopped by Talbot's and I got...the last one of those scarves that wasn't on a display mannequin.

And, since it was a BOGO sale, I also got a second scarf that caught my eye.

For me, the two scarves were a ridiculous amount of money spent. But I'm considering it rounds spent in the ongoing anti-frumpy-fogey war.

Now, I need to bop over to Une Femme and study her scarf-tying methods.

I'll post about the fabric I purchased (only what was necessary for the dress! really!) on Monday...

Monday, November 10, 2008

A Two-success weekend...

I have no idea what the bag sold for (it was a *silent* auction), but a friend of mine purchased it. She didn't realize I had made it until she found the label inside the pocket. I first thought she bought it because I'd made it (um, I hope that sounds like I meant it...not like I was the designer, but just because she knew me), but that wasn't the case. So I guess it looked good enough!

And I looked very, very closely at the shirt onstage Friday night and could just barely tell it lapped right-over-left. I'm sure no one else could notice. The Velcro held well, and opened easily when it needed to, so all is well.

And the young man who portrayed Jesus won 'Best Actor' for the whole district, which I think is really, really cool. They will be performing the musical at Lee High this Thur-Fri-Sat-Sun, if anyone is nearby and would like to see it. Tickets are only 5 - 8 dollars; I think we're going to go back. And, they did qualify for the state competition in December.

The Actor also qualified with his individual events...he did a Dave Barry piece as a monologue, and he and a buddy did Abbott & Costello's classic 'Who's on First?'...and muffed a couple of lines. Somehow, they still managed to pull a Superior rating; hopefully they'll have it iced by State.


And I've got a schedule conflict and won't be able to go and watch, which is a bummer.

Friday, November 09, 2007

The Good, the Bad and the Ugly

First, The Good:
I found the Big Red Button! While I was looking for something else, of course...but the Pesky Weekender is done! Of all the fabrics I've used to date to make Weekender bags (um, I think I've used 5), this was By Far The Most Uncooperative. It shrank when steamed...even the 'rayon' setting was too hot; it slid around like nobody's business, and it wouldn't hold a crease for nothin'. But it does look rather cool, doesn't it?

I finished the first burgundy item last night after choir! The modified bodice of Loes Hinse's City Dress. It looks pretty good here; but the fabric is stiff enough that when I put a jacket on over it the neckline buckles...I think the shoulders are getting pushed towards the center by the jacket. I can kind of push it back, but I have to be Very Particular about how I put on a jacket.


The Bad:
I suppose I should've been on my guard when I arrived at church yesterday with all my sewing gear...and discovered I'd forgotten my box of thread. Fortunately, I had grey thread on my sewing machine, and a spare spool of the same in the notions box, and pile of grey garments to work on, so I figured I could stay busy and didn't let it bother me (much). But it was a harbinger of my foggy brained state...

When last we saw our heroine sewing costumes, she had completed the pockets on one of the ladies' garments and packed everything up. So, yesterday the sewing began with attaching the front and backs of said garment at the shoulder seams. Being foggy brained, and dealing with fabric which was has identical right and wrong sides, our heroine sewed them w/the wrong side of the front to the outside.

And did not realize it until the sleeves were attached. Which means the shoulders had been stitched and serged/trimmed, the neck facing had been applied, trimmed and topstitched and both sleeves had been sewn on.

Remembering that the right and wrong sides were identical, what would you do?

My solution:

Amputate the pockets. Emotionally, it was very hard to do; the pockets looked nice. But it was either that or spend the rest of the day picking the whole thing apart. Costuming, not couture...
The front of the garment is now a bit narrower than intended (I had to true up the side seams after whacking the pockets out), but, well, ya do what ya gotta do.

Finally, The Ugly:

Under the 'Wardrobe Refashioning' heading, here's one with unknown origins that My Sweet Baboo forwarded to me. It's so ugly that not only am I not going to try it, I am only going to put a link here so that the image doesn't confront me every time I open the blog:
Eeeeww!


Edited 11-19-08: that 'refashioned t-shirt' (Jockey shorts cut out for wearing over the head) was so ugly that I winced everytime I looked through my flikr albums so I finally deleted it. I'm hoping everyone has seen it somewhere by now!

Back to costuming!

Wednesday, November 07, 2007

Movin' On

Verse for the day ' ...Forgetting what is behind and straining toward what is ahead, I press on toward the goal...' (Phil. 3:13b-14a, NIV)

I was determined not to post until I finished that pesky Weekender. I pressed, hand basted, wrestled, grumbled at my fabric choice yet again and finally got the thing done to the button.

And I can't find the stupid button.

I know it's in the sewing room somewhere. I began the tear-the-already-chaotic-space-apart thing, then it hit me...this doesn't have to be *finished* for a month. All it needs is a handsewn button; I can set it aside, change the thread out and continue with the burgundy stuff. When I run across the button, I'll take 10 minutes out to sew it on. And if I *don't* run across the button by the time it needs to be done, I'll just do another button. Or something.

I'm not going to let one AWOL big red button throw the whole day out of whack. I've got Better Things To Do.

;)

Monday, October 29, 2007

Light and Color Question

Ok, I'll admit it...I'm stalling.

I got MY Weekender finished, and now I have to turn around and do another one...a Christmas present...before I change the thread in the serger.

And I decided that I really, really should add some interfacing to AT LEAST the straps of the next one. My straps feel a little flimsy. It probably wouldn't hurt to interface the bag facings, either. Or the bottom.

More cutting...tedious cutting at that.

So I'm Not Real Enthusiastic about the next up item...but it must be done, that's Christmas.

Maybe I should just put on a recording of 'We Are Santa's Elves' and sing along whilst I make it?

Anyway, I've got a question for everyone...

Last night was our quarterly Night of Worship at church. It's an awesome service...two hours of singing and praying. No preaching, just worship.

But the choir was instructed to wear jeans with black shirts. And something interesting happened with the lighting. Every time the lighting guy hit the choir with just blue lights all our black shirts turned deep red! I had on a black microfiber charmeuse blouse (Silhouette Pattern's Pam's Blouse, if you're interested) that turned the most GORGEOUS shade of burgundy...I'd buy fabric that color in a heartbeat. To complicate matters, it was interesting to note that my black leather jacket that I wore during rehearsal before the service (it was chilly in the empty sanctuary) stayed black no matter what color of light was on it.

We had no good consensus on why the fabric changed color, let alone why the fabric did and the jacket didn't, and My Sweet Baboo joked that I'd probably blog about it to find out.

Why not?

Anybody know why blue light turns black fabric red?

I have a theory, but I'm going to wait and see if anyone posts a definitive answer before I post it. I don't want to appear to be a doofus. (Maybe it's too late for that?)

Saturday, October 27, 2007

Finished and in use


Whaddya do when you finish the bag? Load it up and use it, of course!

It just so happened that our girls' ministry 'sleepover' was last night, so I packed my hot-off-the-sewing machine Weekender and headed off.

Where I did NOT sleep!

So that's what I'm going to do...Right Now!

ZZZZZzzzzzz.....

ETA after a good long nap...yeesh, what an awful photo. Well, that's what ya get when ya work w/teen girls sometimes! I was obviously dressed for comfort. Anyway, you can see the Weekender bag in use...that's the point, not how an all night event affects my appearance. ;)

Thursday, October 25, 2007

Zipper Stall

I've been working on the Weekenders...well, on one Weekender, anyway. I'm using the red and yellow upholstery fabric I talked about Here. Didn't pre-wash it...it's polyester, right?

And I have discovered that the yellow threads (just the yellow ones, mind you) shrink when I press them hard w/the iron set on polyester. They're melting slightly. So I'm making one bag, which was going to be mine from the beginning anyway, to work the kinks out of sewing this stuff, then I'll do the other one, which will be a Christmas gift. I've got mine done to the lining, and it doesn't look too bad, shrinking yellow thread notwithstanding. I've got the design running three different ways (horizontal on the bag, vertical on the straps, and diagonal on the external pockets I added) that it kinda keeps the bumpies from the uneven shrinkage camouflaged.

I'm *really* glad I didn't try to make a jacket out of it. (shudder)

But, the first thing that's done on the lining is the zippered pocket. And I have two 7" red zippers and one 22" red zipper. No yellow zippers at all. The pocket needs a 9" zipper. So...it looks like a trip to Hancock's today to pick up a couple of zippers, and I'll shop for the buttons too.

Oh, and Hancock's just so happens to have Vogue and Butterick patterns on sale right now.

I've got my list. :)

Tuesday, June 19, 2007

Time for a New Bag

We did have a nice dinner! My Sweet Baboo needed to work a bit late last night, so we didn't have time to catch a movie...but the restaurant wasn't at all crowded when we got there (I guess there are some benefits to going out on Monday). Surprisingly, his salmon was waaaayyyy underdone in the center (it was a thick piece), so he got a fresh plate and they took his dinner off the tab. Upshot: we have enough left on the gift card for another dinner somewhere down the road.

Then we decided to take a walk around the mall, since we were on that end of town. I was in sore need of a new backpack...


The one on the left is about, oh, five years old? Five years of constant use has really beaten it up; you can't see it in the photo but the leather covering the piping has worn through and split in a couple of places. Sad...that was a good, fairly roomy bag.

There was ONLY ONE STORE in the whole mall with leather backpack-style bags...and there were only two styles there. At least I didn't spend hours agonizing over the choice...I just got the bigger one.

Which is not as large as my old one, but it does have some better organizational sections, so maybe it'll be ok.

I'll switch bags for Very Formal occasions, but that's about it. Otherwise, this is my bag. I know, I know, backpacks are clunky, anti-diva, and Not At All stylish. But I can carry it freehanded and it doesn't fall off my shoulder.

It works for me. ;)

Monday, May 21, 2007

Must Sew Project 2

While I was sewing the Bible costumes at church in March, the church receptionist mentioned that she and her family were heading for California immediately after her son's graduation. Turns out one of the places they would be visiting is Carmel-By-the-Sea...home of Loes Hinse's boutique. I laughed about how much I would love to visit that little shop and gave her the web site and headed off to work.

A little bit later, she stuck her head in the door of the room I was working in. "I found a bag on that website that I love!" she said. "It'd be perfect for me to take on the trip...could you make me one like it? I'd pay you and everything..."

Well, of course it was The Weekender Bag. I laughed and told her that I'd made a few of those already...she had even seen one of them, but didn't realize what it was. She said she'd like hers in denim, and I said we'd talk after Easter... ;)

Well, ya gotta know this lady. She is one of the most gracious people you'd ever want to talk to, and has the ability to make folks feel like they are among her dearest friends...valued. She even took a big stack of robe sashes and headband tubes and turned them inside out for me whilst we were frantically trying to finish the costumes up. And, I just happened to have a large chunk of well-aged denim in the stash....so I didn't say anything to her, I just made it.

Graduation is Tuesday, and they're leaving on Wednesday, so I gave her her bag at church yesterday. She was surprised and delighted...it was cool.

This is a *heavy* bag, though...the denim is substantial. The flowered tapestry I used for the pockets (I put one on each side) is the last bit of remnants from a coat I made myself back in, oh, 1989?

I gotta make one of these for myself one of these days! ;)

Friday, February 02, 2007

Gift Bags are DONE!


I told myself I couldn't post today until they were finished; I had to really coax the sewing machine to go through those last few bulky steps, since that stripe fabric is a bit textured and lumpy (the white stripes are woven with bulkier yarns than the blue stripes) and it took a LOT longer than I expected. But they are done...and I can surprise the rest of my friends this weekend with their long-overdue appreciation gifts. Won't that be fun!

I'll write a review of the pattern later today...right now, I'm rushing to get DS2 out the door for a winter camp-out (Brrr! Not *MY* idea of a good time...)

Monday, January 29, 2007

More Thank You Gifts


Miss R was the friend who actually perceived that I was in need of help and did a bunch of phone calling to round up the other four ladies to come and pack. So, I made a matched tote bag/apron set for her.

I love this fabric and had a hard time not using it to make a topper for myself... ;)

The linings are ready on the final two bags; I just need to put the bags themselves together.

Friday, January 19, 2007

Overdue Thanks, Part 2


I don't know why I was all hush-hush on the first Overdue Thanks post...the chances of any of the five ladies for whom I'm making things stopping in here are just slightly higher than the chances of President Bush dropping by the house to say hello. So, anyway, here's the first of the Thank-You gifts; it's Loes Hinse's Weekender Bag, slightly modified. I added two pockets...one on the outside (that's a fused-on initial) just by putting a lined layer between the handles, and a second on the inside by simply omitting the edgestitching along the top edge of the zippered pocket. I also stiffened the bottom a bit with some double-sided Peltex. I haven't put the button on yet; I'm making a total of four of these bags and I thought I'd just sit down and sew all four buttons on at once.

This is a cool bag...it's my first attempt at bag making and it wasn't nearly as bad as I thought. I'm not crazy about sewing bulky fabric...but this upholstery fabric wasn't so bad, about the same as jeans-weight denim. Actually, the biggest problem I had is that the fabric had been coated with some sort of stiffener on the backside that made it rather sticky to work with. I have one more bag to make out of this fabric; the other two are out of a textured blue and white stripe, which is a little lumpy and may give me more trouble. But Loes was pretty careful to minimize seam intersections and such to cut down on the bulk as much as possible, which helped considerably.

I may even make one for me one of these days...